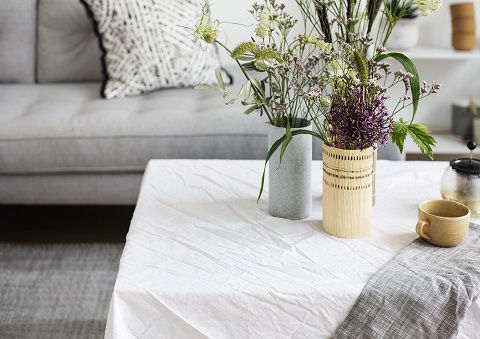
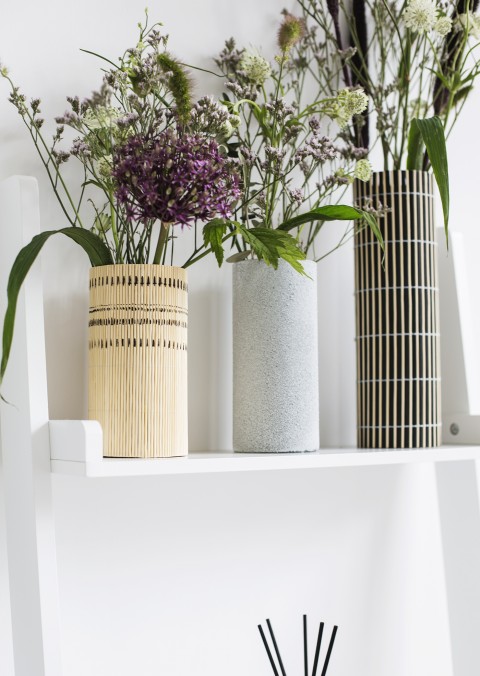
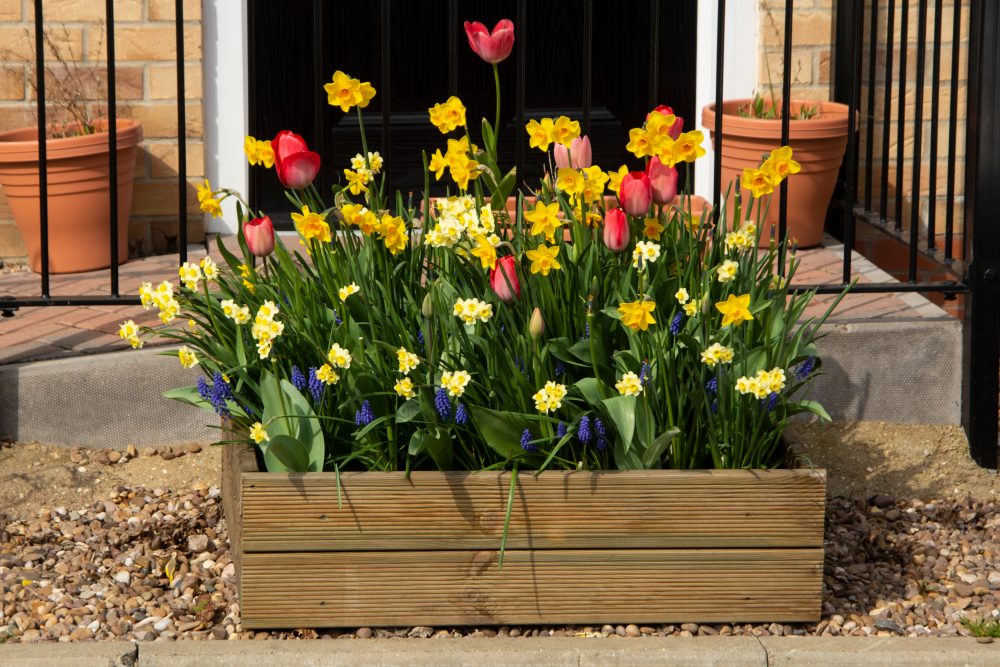
It’s so satisfying to repurpose old objects and give them a new, shiny use or just a bit of a makeover. This cluster of vases looks so pretty as a table centre or a means of decorating shelves and gives a nod to beautifully simple Japanese design.
I had a set of straight glass vases that needed a surge of new life but you could equally use straight sided tumblers or utensil holders to create these decorative vases.
You could even get creative and use them to store paintbrushes and stationery or umbrellas in the hallway, depending on the size. Try looking through your kitchen cabinets for anything you could use for your own vases, the more unique the better!
While you’re searching for an item to upcycle, why not do a mini spring clean? Anything that you no longer use but can’t upcycle or bear to part with, store away in self-storage. Easy to access and secure, it’s the perfect option for storing away old plates, tumblers and serving dishes you don’t want taking up space in your cabinets.
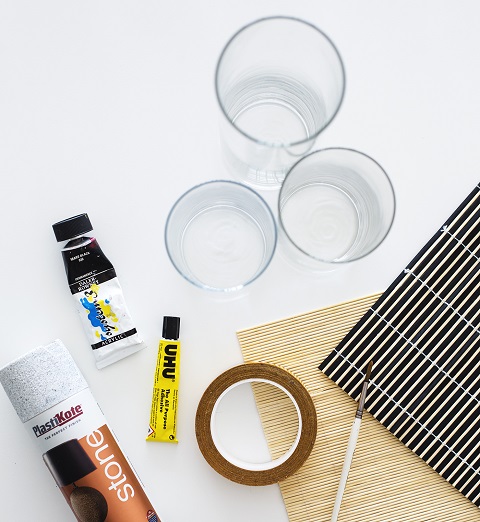
Materials:
Set of straight sides containers in a few different sizes.
- Bamboo placemats
- Stone effect spray paint
- Heavy duty double sided tape
- All purpose glue
- Stanley knife
- Ruler
- Pencil
- Scissors
- Black acrylic paint
- Fine paint brush
Instructions:
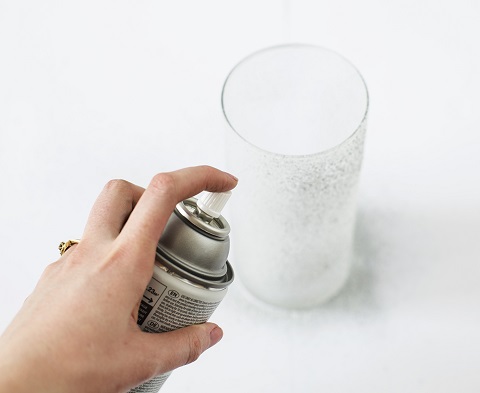
1. Start by prepping the simplest of the vases. Put down some paper to protect your surface and using the stone effect spray paint, cover the whole vase in a thin layer. It’s important to build up the layers gradually with this. Once dry give another thin coat and repeat until you’re happy. You can also turn the vase over to cover the bottom too, but there is no need to spray inside the glass.
2. For the bamboo vases, wrap the placemat around the vase to see the height and width you need. Mark these points with a pencil.
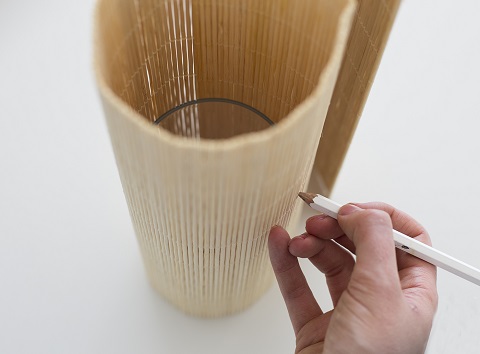
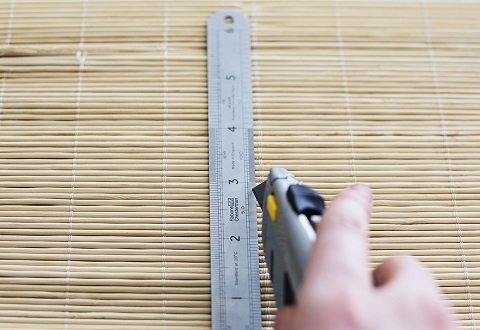
3. To get the placemat to the right height, roll out flat and use a ruler to slice down that pencil marking with the Stanley knife. I found the best way to go about this is to simply score the bamboo with the knife first.
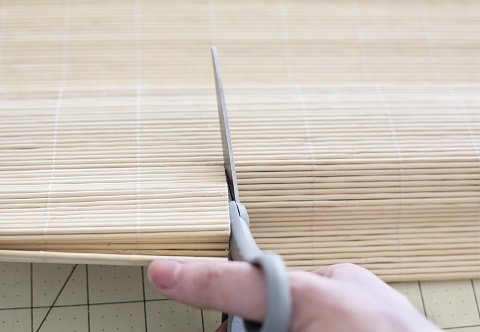
4. Then use the scissors to cut through the already weakened wood.
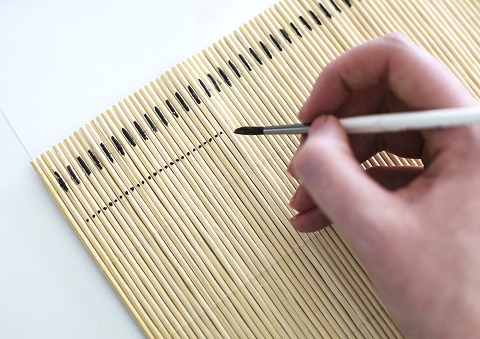
5. If you have plain bamboo table mats like this lighter version I found you can paint a design to run around the vase. Just a simple selection of dots and dashes in a line work really well, but aren’t too fiddly either. Leave to dry.
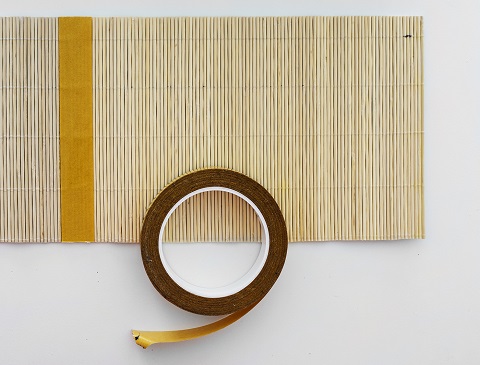
6. Now find the pencil marking you made for the height and line a length of your heavy duty double sided tape down the height to hold the bamboo pieces together before you trim the edge. Use the Stanley knife to cut through the thread and the rest that’s not needed should fall away.
7. To stick the placemat to the vase stick more double sided around the vase in horizontal strips, top middle and bottom.
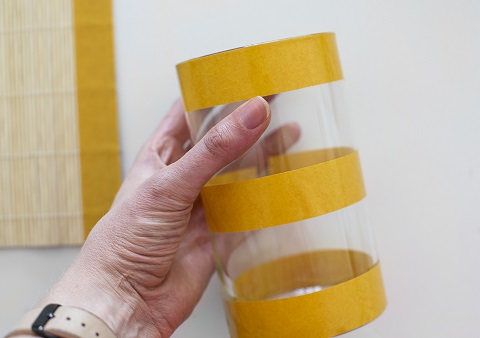
8. Peel these away, along with the initial strip too and wrap the placemat around the vase. Start at one edge and wrap tightly to the glass, making sure the placemat touches the bottom right the way around. Stop just before you stick the last inch down, holding open the flap.
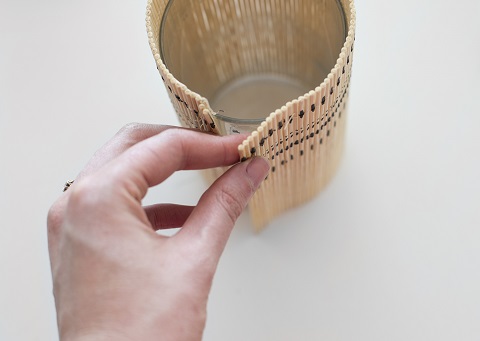
9. Draw a line of the all-purpose glue from top to bottom right beside your starting point. Then when you come to finish sticking the rest down, this will create a reinforced seal so that everything is held in place.

There you have them, ready to use for whatever purpose you’d like. I personally loved styling them up with wild, long stemmed flowers and greenery to create a real focal point in a room.
Leave a Reply